Installing and Configuring Barman Agents
Installation and configuration of Barman agents is covered in the following sections and should be performed in order:
Barman Server Pre-configuration
Foglight requires an SSH connection to access the Barman server. Ensure that there are no firewall or networking restrictions between the agent and the Barman server being monitored.
The Foglight for PostgreSQL cartridge uses the Foglight Credentials system to securely manage credentials for your Barman servers. You must set up the credentials to enable the cartridge to establish SSH connections. The credentials should be associated with the “barman” user (or any user with permission to execute barman commands on the monitored server).
Current limitations
Foglight supports only RSA and DSA keys. If you configure a key pair to access the server, add the following configuration to the sshd_config file of your Barman server to prevent connection issues:
- HostKeyAlgorithms +ssh-rsa
- PubkeyAcceptedAlgorithms +ssh-rsa
If you plan to use username and password authentication, then only the following configuration parameter is required:
- HostKeyAlgorithms +ssh-rsa
Restart the SSH service of the server after making the change.
Setting the Credential
To set the credentials:
- Navigate to Administration > Credentials in the left pane.
- On the Credentials dashboard, click Manage Credentials.
- On the Manage Credentials dashboard click Add.
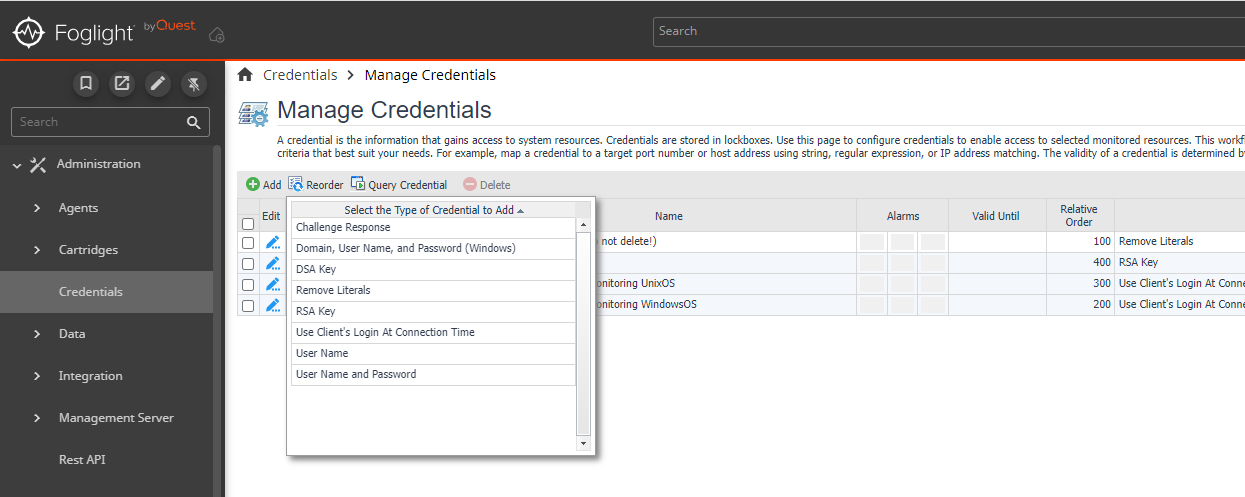
- You can select any of the following type of credential depending on your system configuration or preference:
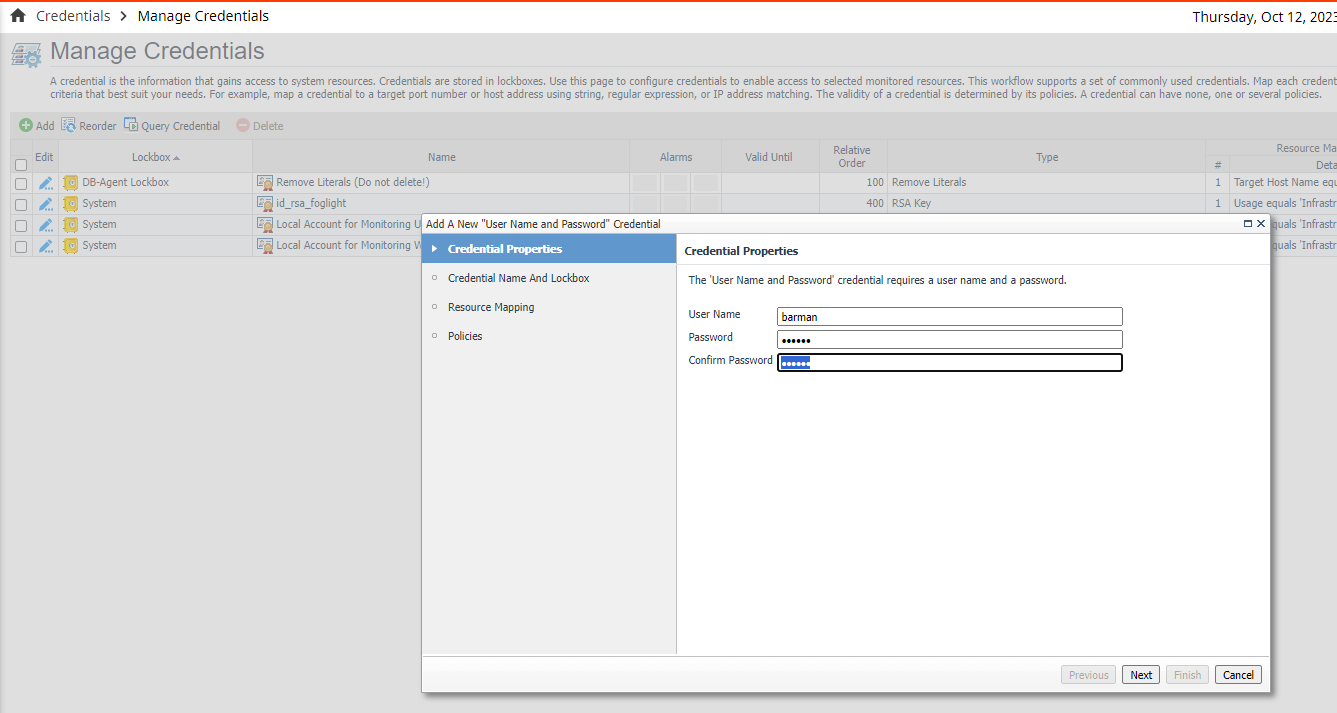
- Username and Password - Add the Username and Password.
- RSA Key - Generate a new RSA key using the following commands (use -m PEM to ensure the key is in PEM format):
ssh-keygen -t rsa -m PEM
Follow the command prompts to generate the key pair. You will be required to provide a passphrase for the key.
After generating the RSA key pair, add the public key to the ~/.ssh/authorized_keys file for the respective account.
cat id_rsa.pub » ~/.ssh/authorized_keysAdd this public key to the “barman” user or any user that can execute barman commands, otherwise data collection will fail.
Once the key/pair is created and added to the authorized_hosts file, check if you can use it to connect to the Barman server.The permissions on the .ssh directory should be 700, and the permissions on the authorized_keys file (./ssh/authorized_keys) should be 600.
ssh -i id_rsa <barman@examplehost.com>
If it works, create a new credential and load the private key to Foglight. - DSA Key - Follow the same steps as for the RSA key creation except create the key pair using DSA format.
ssh-keygen -t dsa -m PEM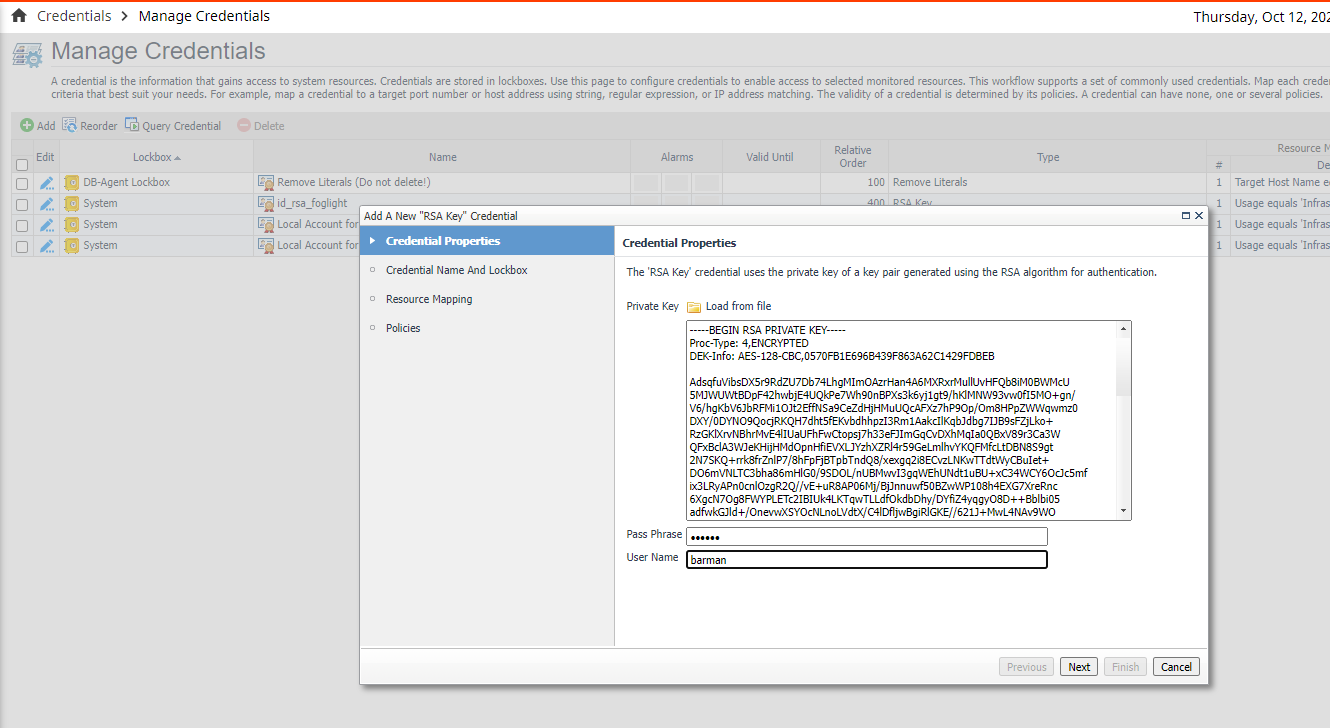 Click Next.
- Username and Password - Add the Username and Password.
- Credential Name and Lockbox - After adding the new credential properties, you can select either the existing System Lockbox or create your own.
Do not select the DB-Agent Lockbox option.
If you create a new Lockbox you need to Manage the credential release in the Administration > Credentials > Manage Lockbox section.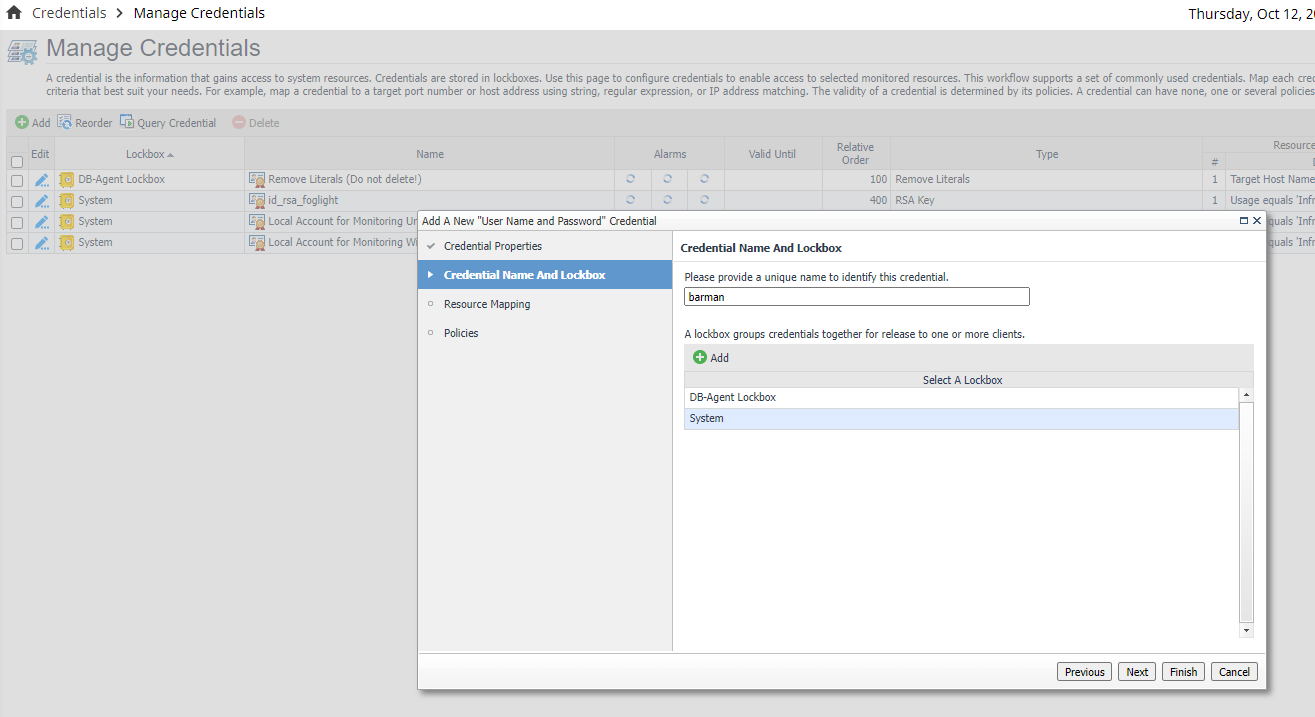 Click Next.
 - Resource Mapping - The resource mapping section is used to map the credential to a given resource. Click Add and select the following options:
- Usage: Infrastructure Monitoring for Unix
- Access Resources Using: You can select between Target Host Name or Target Host Address
- Equal or Not Equal: equals
- Matching Type: Select the correct matching type for your case. If you have selected Target Host Name in the Access Resource Using section, then you can select the Domain Name option and input the host domain name that is running Barman. If you have seleced Target Host Address, then you can select Exact Match or any of the options that suit your needs. Regardless of your choice, verify that you are using the correct Host or IP Address for the Barman server.
 Click Next.
- Policies - Policies are optional and not required for Barman monitoring. Click Finish.
Configuring a Barman Agent
A single agent can manage all Barman connections, depending on network accessibility. You can use an existing PostgreSQL agent or create a new one. However, it is recommended to create a dedicated agent for Barman monitoring to prevent overlapping connection issues or errors that may occur with regular PostgreSQL server monitoring.
To set up a dedicated agent for Barman monitoring:
- Create a new PostgreSQL agent.
- Enable the Only Collect Barman Data with this Agent property.
- Leave the PostgreSQL connection properties at their default values, as they will be ignored.
- If you want to add Barman monitoring to an agent that also monitors a PostgreSQL server, leave the Only Collect Barman Data with this Agent property unchecked.
You can configure Barman monitoring through the Agent Status Dashboard. For more information refer to the Using the Agent Status Dashboard section to create new agents.
Setting Barman Monitoring Parameters (mandatory)
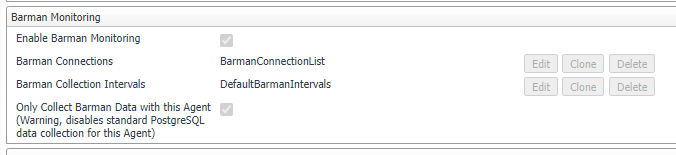
- Enable Barman Monitoring – Enables Barman monitoring if turned ON. Default is off.
- Only Collect Barman Data with this Agent – Select this checkbox to configure the agent to collect only Barman-related data. When enabled, the agent will ignore PostgreSQL server connection properties and will not attempt to establish a connection to the PostgreSQL server.
Setting Barman Connections (mandatory)
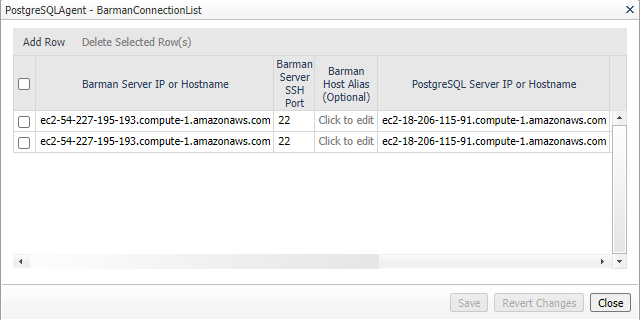

The Barman Connections property stores a list of connections that contain all necessary details for connecting to a host running Barman. These connections allow the agent to execute commands for each PostgreSQL server being backed up and monitored.
To monitor a PostgreSQL server, add a new row for each instance. If multiple PostgreSQL servers are backed up on the same Barman host, add a separate row for each server while keeping the Barman host values the same.
- Barman Server IP or Hostname – The Barman hostname or IP that you would like to monitor.
- Barman Server SSH Port – The SSH port number that the Agent will use to communicate with the Barman server.
- Barman Host Override (Optional) – The hostname property for the Barman server topology object is set by default to the connection parameters defined above. However, you can override this setting if needed.
If you are monitoring the OS, ensure that the hostname used by both the Barman agent and the OS agent match so they can be properly linked.
Always use the same override for a given Barman server to prevent the creation of multiple topology objects for the same server.
- PostgreSQL Server IP or Hostname – Specify the hostname or IP address of the PostgreSQL server that Barman is backing up.
- PostgreSQL Server Port – The port of the PostgreSQL server that Barman is backing up.
- PostgreSQL Host Alias (Optional) – If you currently have other PostgreSQL Agents that are collecting data and have the Agent Host Name set, then you must ensure to also use the same Agent Host Name here. This is especially important to avoid the creation of multiple topology objects in Foglight.
- The Barman configuration name for this PostgreSQL Server – This is the special Barman server name or ID that must be configured in the in the Barman configuration files to identify a PostgreSQL server. This value is unique per Barman server and is required to be able to run Barman commands on the server.
- Limit of Backups to Collect – The limit of backups to collect every time the Barman Backup Collection runs, this limit exists to avoid collecting a large number of backups on each run. The Barman collection will always return the newest backups. Default is 10.
- Connection Timeout (sec) – The amount of time to wait before the connection to the Barman server is considered to have failed. Default is 30 seconds.
- Enable Monitoring – True or False indicator to check if the specific Barman PostgreSQL connection server should be enabled or not.
Setting Barman Collection Intervals (optional)
The Barman Collection Interval list in the agent properties is used to set the sample frequencies (in seconds) for the various collections performed by the agent. Default settings are provided in the Default Intervals list installed with the cartridge but can be copied and modified by the user. Collections can be disabled by setting the interval to 0.
- Availability – The heartbeat collection verifies whether the server connection is active and measures the connection time. This process should run frequently. The default interval is 60 seconds.
- Barman Check/Status/Show-Server – Collects data from the result of executing the barman check, status and show-server commands. Default is 300 seconds.
- Barman Backup – Collects backup data from the result of executing the barman show-backup command. Default is 900 seconds.